|
Open the Software: Create a
New Project
|
 |
Refer to
your tri-fold brochure,
Microsoft Visual C++
Quick Reference Guide,
as you read through this page
for the first time. |
Microsoft Visual C++ 6.0 is a powerful,
sophisticated software package. It can be used by a novice or by
a professional designing sophisticated Windows applications. In
this introductory course, we will only be using a small portion of
the capabilities of this software package.
Let's get started!
|
Open
the Software ( MS Visual C++)
(If you are working on a
networked system, you will need to login to your system and then access MS Visual
C++.)
If you are working in a PC environment:
1. Open Start Menu
2. Select Programs
3. Select MS Visual C++ 6.0 |

|
When the Tip of the
Day dialog box appears, close it by clicking on the Close button. If you do not
want to see the Tip
of the
Day every time you open Visual C++, click the Show tips at Startup check box to
remove the check mark and deselect this feature.
Create
a New Project (refer to your tri-fold
brochure)
|
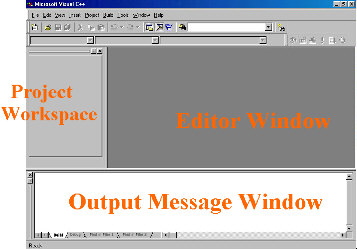
Microsoft Visual C++ offers an easy-to-use
GUI, graphical user interface. It contains a Project
Workspace window, an Editor window (where you
will write your programming code), and an Output Message window
(where you will see your error messages).
1. Pull down FILE
menu
2. Select NEW |
|
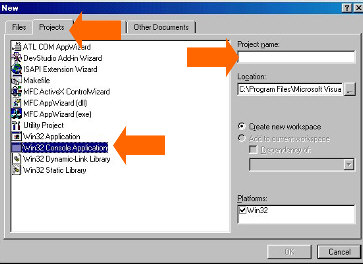 |
Visual C++ organizes programming tasks into projects.
EVERY program that you write MUST be placed within a project
before it can be compiled and executed.
3. Select
PROJECT tab
4. Select
Win32 Console Application
5. Enter a project name
6. Click OK |
|
** Be very careful NOT to select "Win32
Application" by mistake as this will
cause BIG problems
for your programs in this course. |
|
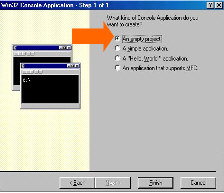
7. Select Empty Project
8. Click Finish |
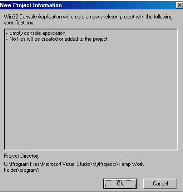
9. Click OK |
Good job!! You have just set up your project.
Now let's move on to writing programs.

Return to Topic Menu |
Computer Science Main Page |
Terms of Use
|
MathBits.com
|
